ARTICLES
Setting up ghost in raspberry pi for free
- 2 minutes read - 341 wordsThis is part of my Today I Learnt series where I share whatever I am learning something new. After having issues with port forwarding in Xfinity I decided to look for alternative solutions. I have used Cloudflare tunnel (used to be called Argo Tunnel) in the past to expose websites running on my laptop to the Internet. So, I decided to try it out for Ghost blogging site which I am setting up for my dad.
Things that I had already set up
- Cloudflare free tier account and added the domain
- Raspberry pi with Docker installed
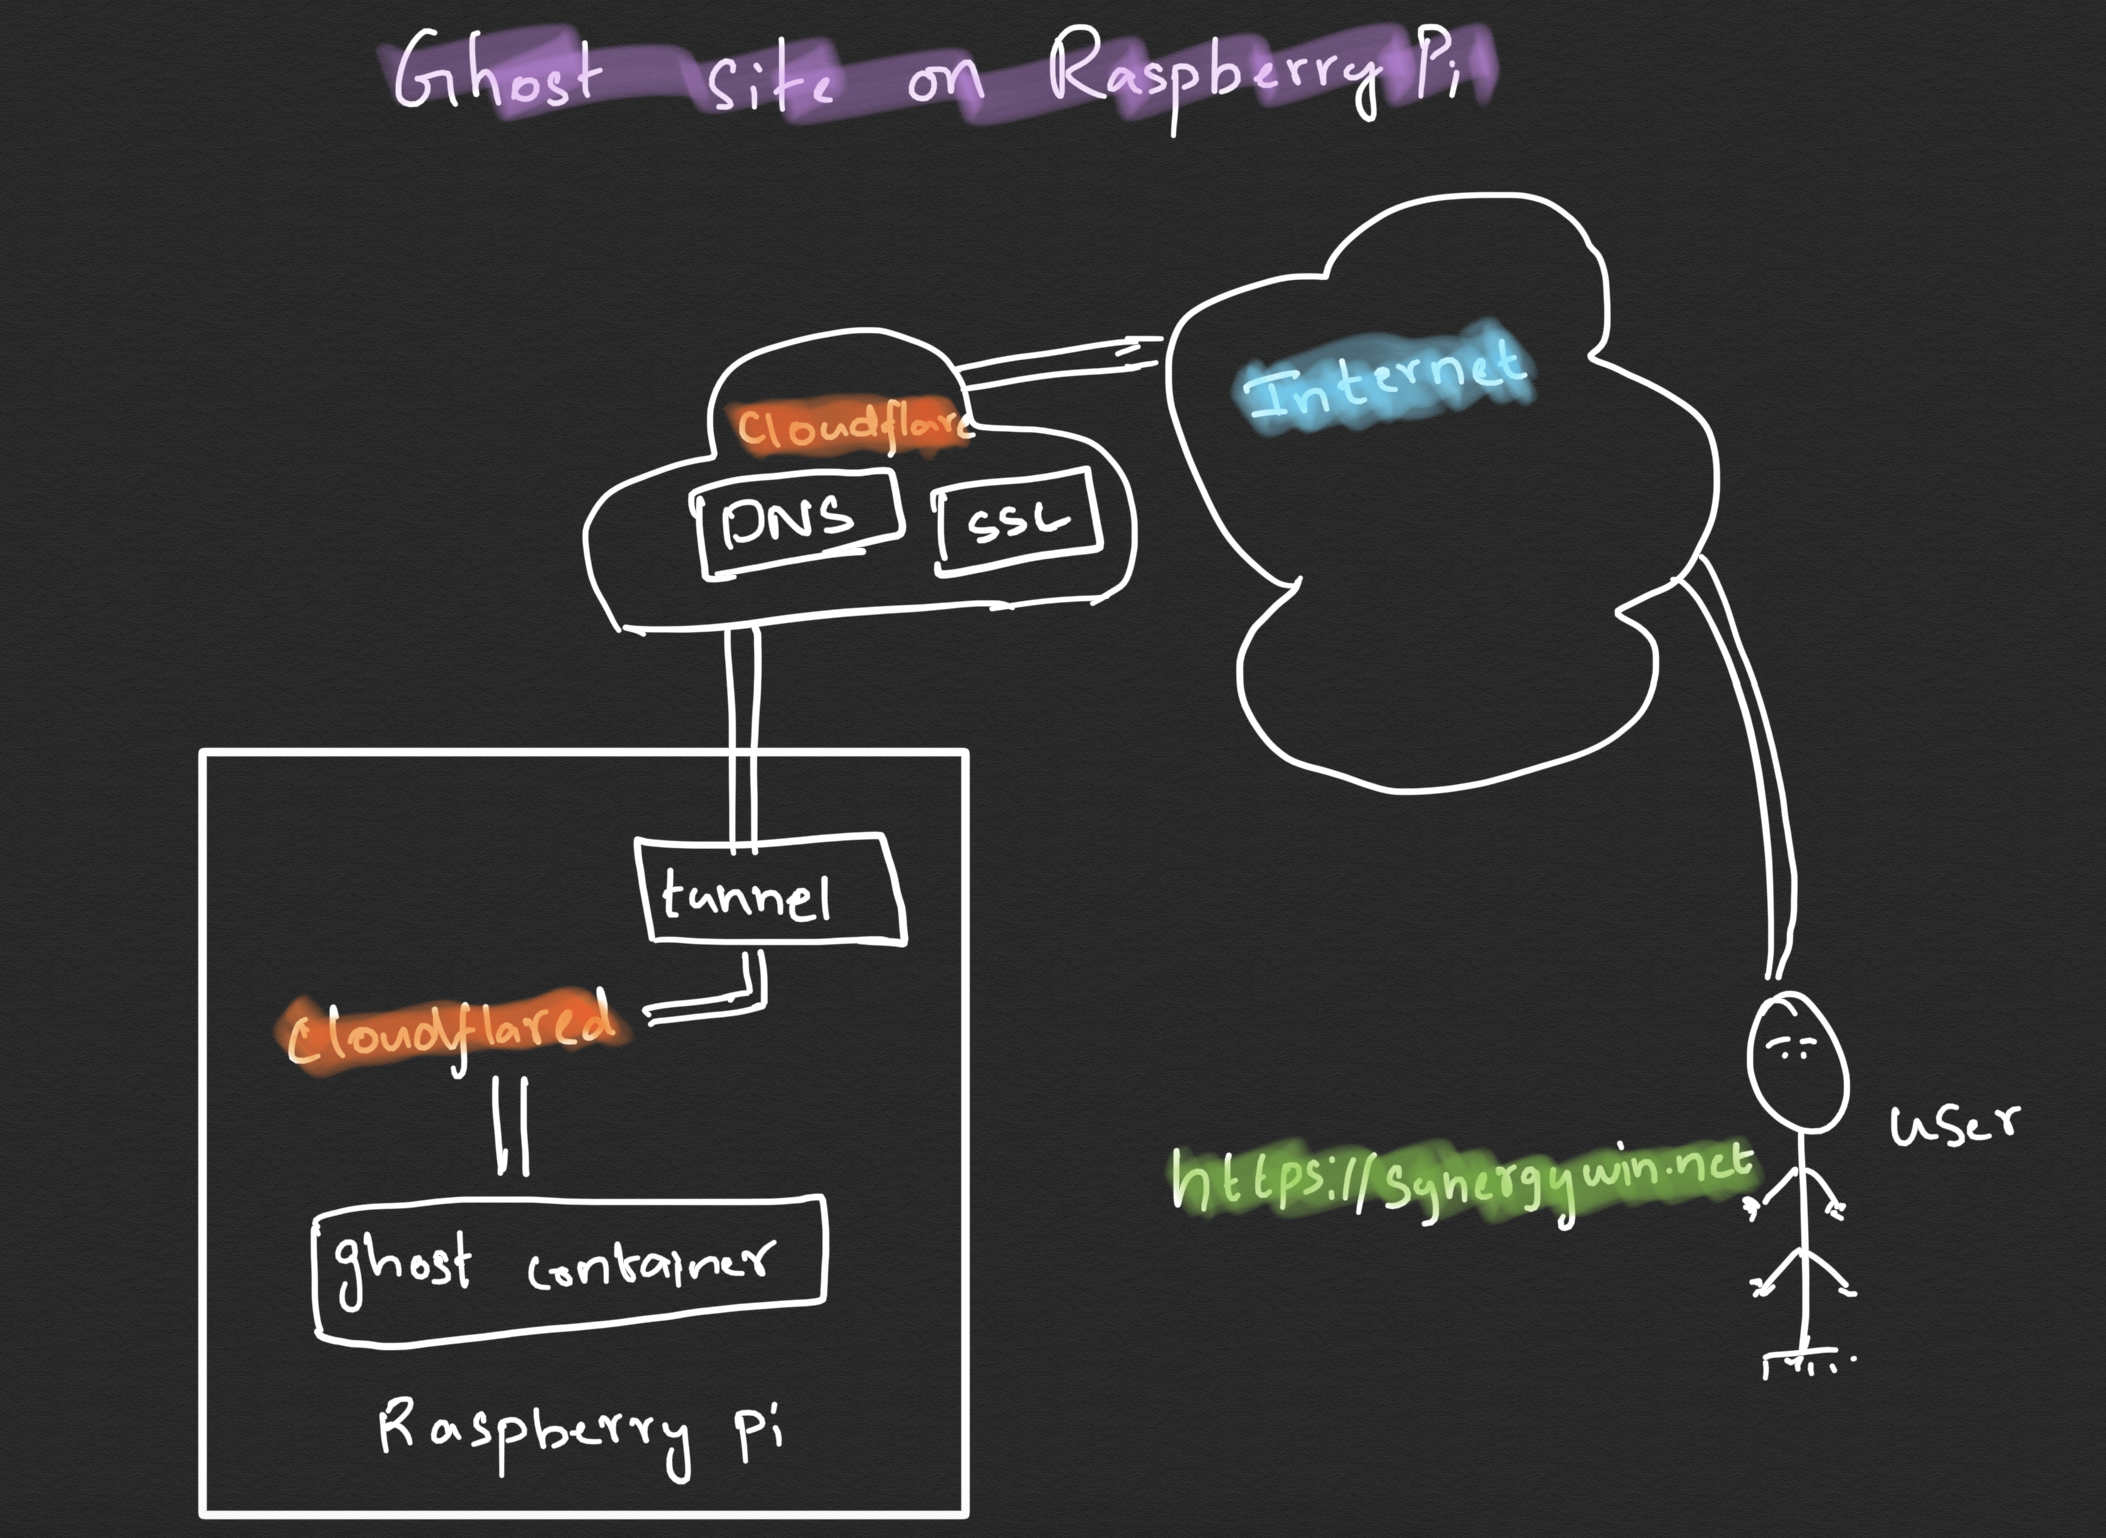
The overall architecture looks like this:

Here are the steps which I did:
- Create a docker volume
docker volume create ghost-synergywin-net
- Create a docker container using ghost image [1]
docker run -d -e url=http://localhost:3001 -p 3001:2368 --name some-ghost -v ghost-synergywin-net:/var/lib/ghost/content ghost
I mapped raspberry pi port 3001 to containers port 2368 and passing environment variable url as localhost. Mounted the location /var/lib/ghost/content to ghost-synergywin-net volume.
- Confirm that the ghost site is up
curl http://localhost:3001
Next I replaced url environment variable with the actual domain
docker run -d -e url=https://synergywin.net -p 3001:2368 --name some-ghost -v ghost-synergywin-net:/var/lib/ghost/content ghost
Next is exposing this website securely to the Internet. Because, raspberry pi is running on my Local Area Network (LAN). I need to make it accessible from the Internet. To do that I used Cloudflare tunnel
I added the domain synergywin.net to Cloudflare
Installed [2] cloudflared executable on the Raspberry pi
Authenticate [3] cloudflared which creates
cert.pemfileCreated a tunnel
cloudflared tunnel create ghost-synergywin-net
- Created a config file for the tunnel
credentials-file: /home/pi/.cloudflared/<uuid>.json
tunnel: <uuid>

ingress:
  - hostname: synergywin.net
    service: http://localhost:3001
  - service: http_status:404
- Added a CNAME in the Cloudflare dashboard for the hostname with
.cfargotunnel.com - Ran tunnel using the above config
cloudflared tunnel --config config.yaml run &
Actually, that is it. I am able to reach my dad’s blog over the Internet now.
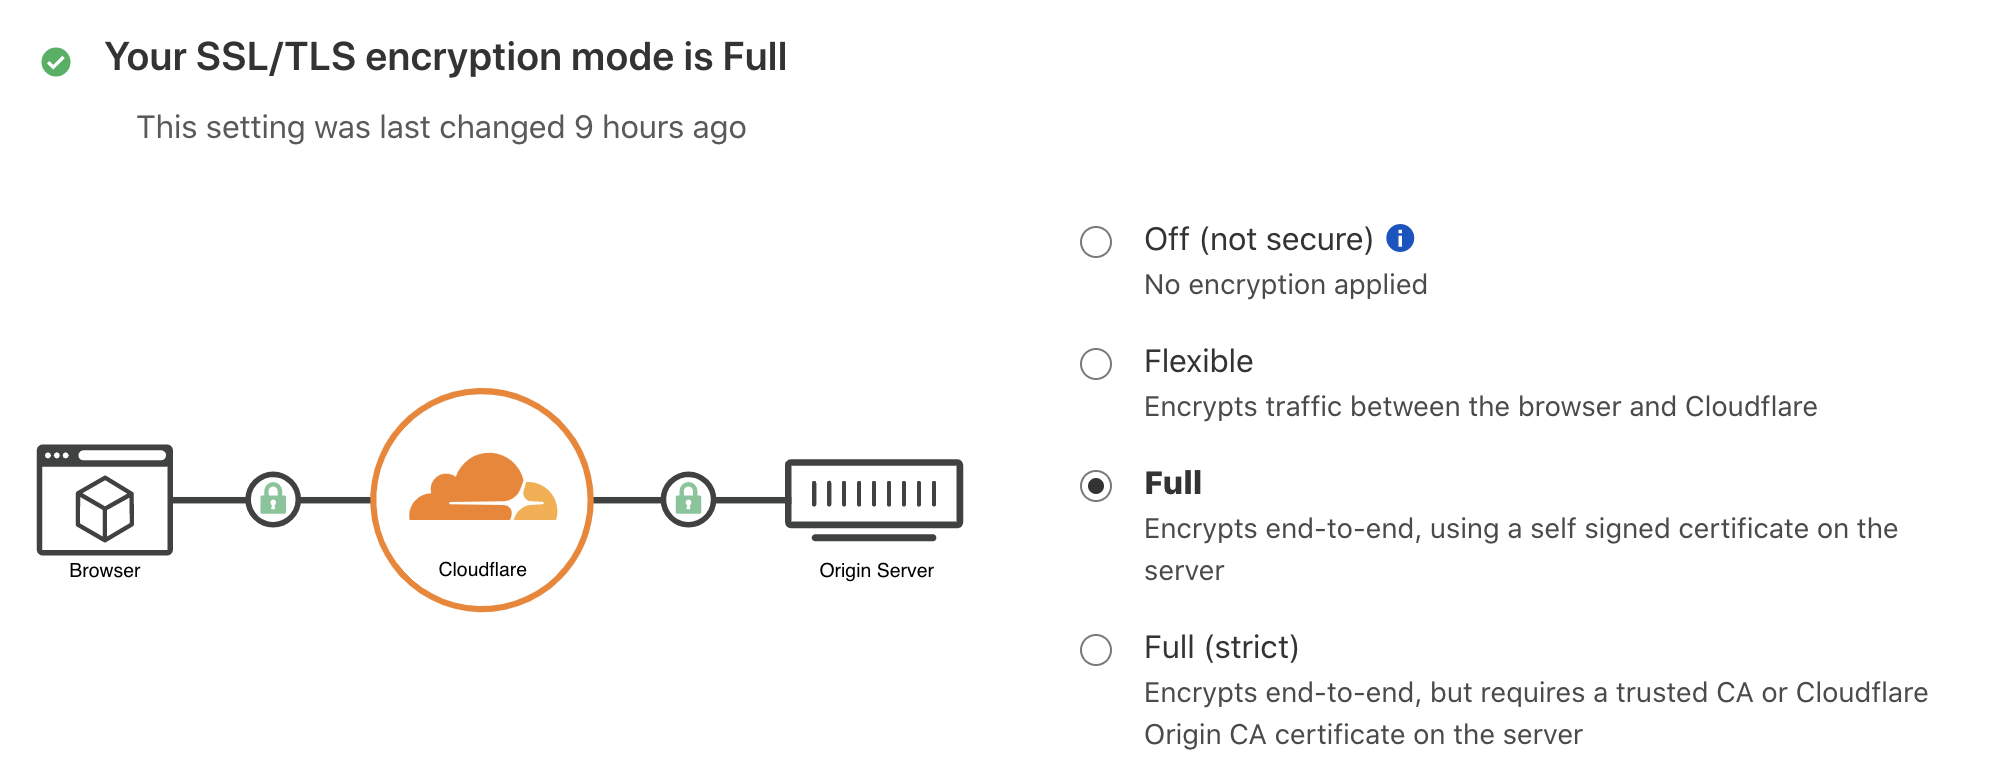
Bonus, I also got SSL  enabled using Cloudflare itself for free with just a click of a radio button :)
References: